Photobucket Photobucket Photobucket Photobucket Photobucket
Showing posts with label WOW. Show all posts

Thursday, February 25, 2016

HIP HOP

Hi there! 

Its Tanya here sharing a couple of layouts that have been on my desk this month.
The first one is of my daughter at her end off year dance concert. 

The WOW products I have used are


This was a messy fun page using some paints texture paste and sequins to create a mixed media style page. I started with a sheet of heavy white card stock slapped some purple paint on and then added hot pink before the purple had died to much. Then ii left it to dry completely and added some texture paste using the Crosshatch stencil randomly. Then I splashed some black paint over the layout and sat it aside to dry.
Once it was dry I put it all together added the embellishments and the Hip Hop title which I had painted and stamped over with black ink.


Dont forget there is a great challenge over on our Facebook page, the February Challenge - Australiana.
We would love to see what you come up with!
Here is my layout

WOW products used

Thanks for stopping by, please share what you have created on our Facebook page, we love to see your work!
Tanya

Monday, February 22, 2016

A Mixed Media Canvas

Hi there!

Tania here with you today to share a canvas and a photo tutorial.

Lots of yummy WOW Products Used :

Chicken Wire Piece - WOW1636
Fabulously You Title - WOW2464
Mini Background Panel 2 - WOW2182
Butterfly Elements - WOW1858
Messy Circle Frames - WOW2144


To begin with I firstly applied 2-3 different coloured acrylic paints with an old credit card.


Once this was dry (I sped up each step by drying off each layer with a heat tool)
I grabbed one of my stencils and randomly applied texture paste over the canvas.


I repeated the above process with the second stencil.


Next up I added all my chipboard pieces and adhered them to the canvas.


Then it was time to give it a nice thick coat of gesso, I applied the gesso with a sponge so it would give it more texture.


This next bit was where all the fun happened, I used an assortment of different 
sprays and sprayed them randomly over the canvas until I got the effect I was looking for. 
I then grabbed a Gold paint dabber and painted the title, the butterfly and the frame around my photo, and then dabbed the paint over different parts of the canvas.


To finish off the canvas I embellished it with lots of yummy blooms and an assortment of pearls.

Some close ups of my finished canvas!  


Well thats all from me today.

Thanks so much for stopping by and happy crafting

Tuesday, February 16, 2016

Boys

Popping in to share a page today.
A pic of me with a touch of 'hat head',
 and my youngest boys on holiday in Tassie,
visiting Salamanca Martkets.
WoW products used are the 'This Moment' corner, the place marker at top right of photo, the dangling heart, and 'Twenty Fifteen' title. The background was done by stamping with paint and punchinella. I also used an old Hambly transparency (love those!).

Thursday, January 21, 2016

Altered Ornate Shadow Box

Hello there!

Tania back with you today to share this quick and easy photo tutorial on how I altered one of the WOW Chipboard Ornate Shadow Boxes - M15.


Once I had assembled my shadow box I mixed a little bit of one of my Dylusions sprays (aqua based) with some Gesso.  With a large sponge I applied it to my shadow box quite thick, when it was almost dry I gave it another coat. As you can see it gave it some great texture.


I then used some Ken Oliver Color Bursts to give my shadow box some colour.  I just love this product, lots of fun and looks awesome.  I chose purple for this project.  I sprinkled the Color Burst randomly over the shadow box and then spritzed it with water until I was happy with the colour......How easy is that??


I finished off my shadow box with some New release chipboard - Dangles and one of the "Love This" quote from the Fun-Multi Word Pack WOW2457 which I sprayed with Dylusions sprays and lastly added lots of yummy blooms.

Here's a couple of close ups.


I also wanted to share a couple of other projects I made recently using some yummy WOW products.
I created this first layout for White With One's new challenge. Butterfly Elements WOW1858, Hanging Heart Flourish WOW2287,  Fun-Multi Word Pack WOW2457  and the 6 x 6 Moroccan Stencil ALTA138.


My second project was created for Off the Rails latest Mood Board Challenge.
I have used a New Release "Summer At The Beach" WOW2466 Chipboard Title on this one. 


Well that's all from me today.  I do hope you have enjoyed the projects I have shared with you today.

Be sure to check out the Website for products and stockists and our new WOW Creations Facebook page. Can't wait to see your creations on there using all the gorgeous WOW products.

Until next time,

Tania xx 

Monday, January 11, 2016

New Dream Catcher

Hi WoW peeps, welcome to the New Year, here's hoping it's a ripper!

Today I'm sharing with you an awesome off the page piece, a 12" diameter MDF Dream Catcher I have altered as a gift for my boy when he turns 21 this year. I love how this turned out, let me show you how I did it.

I started by adding lots of colour (Dylusions and Perfect Pearls), inspired by the beautiful water colour challenge this month
(see end of post). Once dry I inked all the inside edges black with a Copic marker.
I used  a 12" x 12" white card to mop all the wet colour up and stuck a piece of black card to the back of it. With the black facing forward and the colour-on-white facing back I glued it to the back of the dream catcher and trimmed off the excess, sanding around the edge for a nice finish. I sprayed the front with lots of gold shimmer to make it shine, and it does :-) I also added the challenge quote using a Motex labeller which has a nice art-deco font. I removed the lower panels with a craft knife (and sanding with a file) to allow for feather hanging space.

The back was also inked with a black inkpad and sprayed gold.

The 3 MDF feathers that came with the dream catcher, along with a few real (white) ones were also given the same colour treatment. I coloured some of the white feathers with grey to add some contrast. They all got gold shimmer.

To attach them to the dream catcher required a little ingenuity, I wanted it to look clean and stream-lined so this is what I did....
With a fine line of liquid glue (Tombow Mono-Multli - green) I stuck the string (also sprayed gold and dried) along the shaft of the feather. I covered the join with a strip of co-ordinating washi tape. For the MDF feathers I threaded them with leather thonging, sticking it to itself before the next step.

I then used 3mm double sided tape and wound a 3mm yellow ribbon along the shaft to cover the washi, tucking the string end back under itself using a fine quilling tool. To ensure this doesn't come apart I painted the whole ribbon bit, and up along the string, with Tattered Angels Glimmer Glam which acts as a glue and dries to a gorgeous shiny gold sparkle. 

I tied all the feathers to the bottom of the dream catcher using a half hitch knot and reinforced the knot with Glimmer Glam. I left the tails of the leather thonging long and glued some bright orange feathers onto them, covering the join with beads (and glue down the middle). The tails of string I cut short.

And this is the final product. Took me a while but I seriously love it!

Inspired by our current challenge
Come and join us, click on the image above to go to the blog, or see us on Facebook and share your creations.
Happy New Year may it be full of creativity.

Thursday, November 26, 2015

Almost a Teenager

Hello folks, hoping you are all well.
Peg here to share some WoW goodness today.
I have done a boy page using some new release chippies for November as well as some tried and true favourites.

I started by misting my white card using the 12x12 Moroccan chipboard as a stencil, rotating it clockwise for the second colour. This is also available as a stencil and both in 6x6 too.

I then stuck some cogs, from the 12x12 nesting set, in the corners and added some leftover cut-outs from the Moroccan chippy (these are a bit of a special treat as they are not yet stocked in the shop). I rubbed all the chippy with some Inka Gold- Graphite to give it a metallic look.

It didn't look quite right though, so I used a paint dauber to add some blue.

Next I layered some tissue paper, some New Release chipboard treated with Inka Gold-Graphite, my photo, and a title from my own design range painted to match the cogs. Journalling with Dymo - my fave.

And I thought it was finished so it went on my desk-top easel until I had time to get it into an album.
However..... the more I looked at it the more unfinished it appeared.

So I added some subtle diagonal stripes by sponging
black ink through the 4-in-1 Design 2 Altamatz, as well as adding a swirl border, from the New Release summer pack,
above my title.
Ahhhhh, now it's done!

 So, have you checked out our inaugural monthly challenge, it's a beauty. You still have a few days to play along, anything goes as long as you use Wow products and post your creation on our FB page.
This is the page I created for it.

Thanks for coming by, have fun with the challenge, see you next time

Monday, October 12, 2015

A Perfect Page....

I had the most amazing time hanging out with these gals at a Hunter Valley retreat in August. We laughed and cried and shared so many stories and poignant moments that it was hard to do it justice on a scrapbook layout. I spent longer than I normally would on this page and, to me, it shows.

I used a technique on the background learnt from the gorgeous Naomi Cox, with some added stencil work using my new release Boot Stencil and another current fave, Lighthouse Flourish.
The page is also embellished with these chippies - cogs, barbed wire, love this, mini people, a zig-zag arrow, some Prima doodads, a cut file, and Dymo for the captions. I used American Crafts foam words for the title and typed out a long and heartfelt story which is hidden in the envelope.

I poured my heart and soul into this page and I love it so much because it really does completely and perfectly represent my experience at this retreat.
This, to me, is why I scrapbook.

I hope you find some inspiration in this post and have some awesome fun playing with your WoW products. Please come and share your work with us in our new Facebook Group, we love to see what you're creating with WoW!

Thanks for coming by

Thursday, November 7, 2013

Tarrah's Week of Shares...Hey Dude.....

Hello again all,

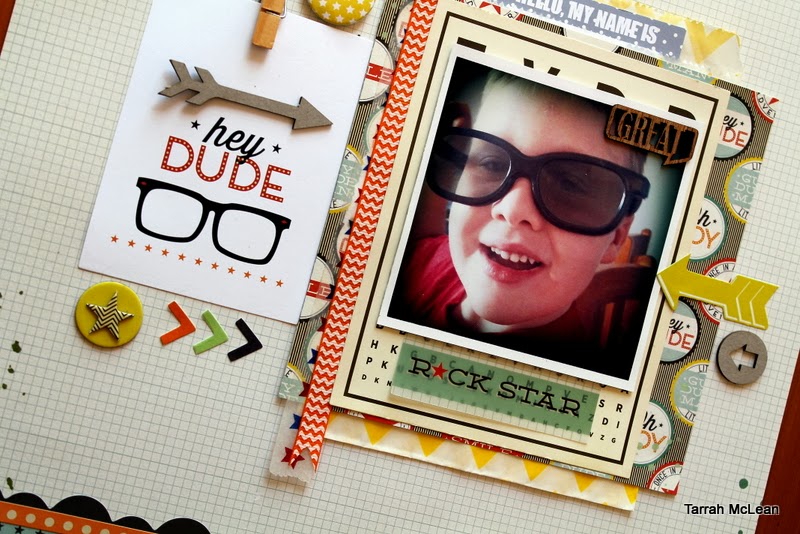
Tarrah here with you again to share my last layout for the week featuring WOW products with you!!

This would have to be one of my favourite layouts at the moment, I was able to get my hands on some of the new Pink Paislee 'Hey Kid' range and its perfect for my style of scrapbooking!  


I found it so easy to add some favourite pieces of WOW chipboard to this layout, complementing the Hey Kid range nicely!!


WOW products used:


Thank you so much for stopping by the WOW blog all week to see what I have been creating, be sure to check back again soon for more awesome inspiration from the WOW design team!!
Happy creating....

Tuesday, November 5, 2013

Tarrah's Week of Shares....Love You...

Hello again everyone!!

Tarrah here again with you to share another layout featuring WOW chipboard.
On this layout I have used a few different WOW pieces which I think really pop against the chalkboard paper...

WOW products used:


Thanks again so much for stopping by the WOW blog for some inspiration, be sure to check back here again, I have a couple more layouts to share with you this week....
Happy creating...

Saturday, October 12, 2013

Tess's Week - 'Beautiful'

Tess back again with a sneaky Saturday share.... With all of the yummy new release items set to go live, I thought I would break the rules again and share one that is in that release. I had amazing fun with this layout and have been hanging to share it since retreat.
 
Beautiful
Using new release chipboard 'Beautiful', chipboard Narrow Arrow Pack (WOW1893) and chipboard Feather from Feather Set (WOW1562)

 
Lets start with the new release word 'Beautiful'. I have covered it in a layer of white Gesso and dried it. This will prime the surface and make it white.
 
I have then used the same paint that I used on the splats to tie the same red through into the layout.
 
If you haven't used Gesso before, it is a paint like product that simply puts a base onto the product you are using.
 
The chipboard arrows have been coloured with a black sharpie marker.

 
The chipboard feather has been coloured in with a while gel journal pen. I find that there is an angle to hold the pen at where it will put lines into the coating and make it look like a real feather - it gives it texture.

 
I hope you are ready for tomorrow with the amazing new release due to go live. I know you wont be disappointed by this one. There are things in there for everyone and if you are half as excited about this release as our design team, you will love what is coming your way!!