



Photobucket Photobucket Photobucket Photobucket Photobucket

Thursday, November 17, 2011

Christmas Card Designs

Christmas is a great time to get crafty and make lots of handmade cards and goodies. And WOW chipboard is the perfect addition to anything you make. Today, I wanted to share some Christmas projects I made using WOW chipboard. I made some cards, a gift tag, a bonbon and paper stocking.  Here are the projects I made - beware, this post is photo heavy :-))))

And now for some close ups :)

For this card I used the title 'Merry Christmas' from the 'Mixed Christmas Card Words' and a bauble from the 'Christmas Card Embellishment Pack':

I painted the chipboard and applied some glitter. I painted the title red but used green glitter for contrast:


For this card I used 'Christmas Stocking' and the title 'Joy' from the 'Mixed Christmas Card Words'. I used markers to colour both in carefully and then I put glitter on the mouse to make it stand out and on the title:


Here I used 'Christmas Flowers' which I coloured using markers and added some sparkle using rhinestones:

Here I used the very cute 'Goofy Reindeer':
 

For the last three I used the 'Christmas Charm Pack' which I have to admit are my favourite. These are so adorable. Here's Father Christmas, I also used the title 'Ho Ho Ho' from the 'Mixed Christmas Card Pack':


For the bon bon I used the very, very cute reindeer, he got a little red glittered nose:

And here I used the cute Christmas tree:

So many adorable Chipboard designs to choose from :)))) Use them for all your Christmas projects. Happy Crafting.

Monday, November 14, 2011

Beautiful Reindeer


Have you checked out the great range of Reindeer that are available from Words or Whatever yet????

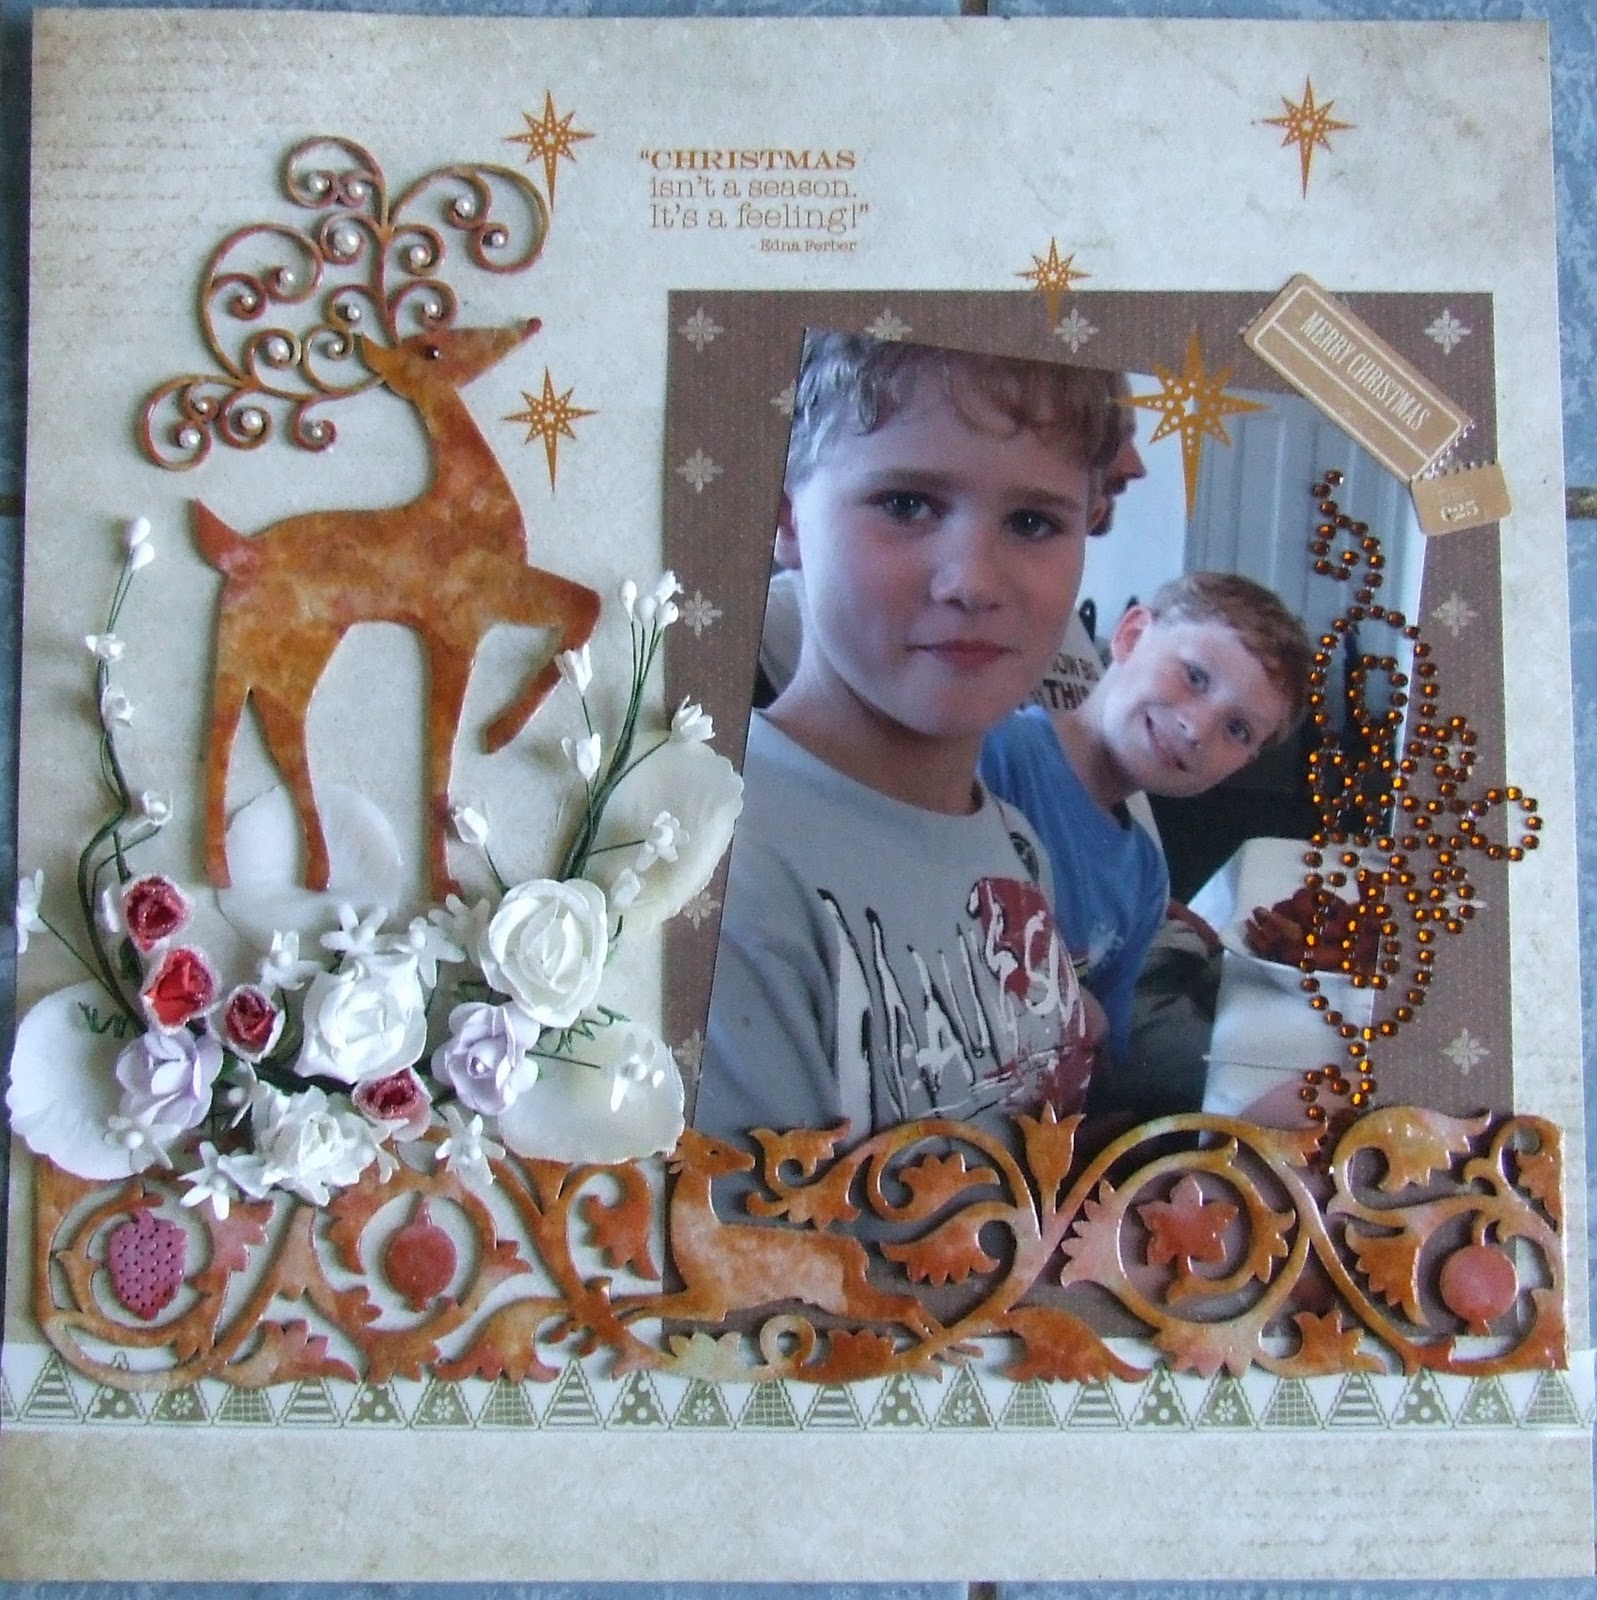
There are over 20 designs of Reindeer, including numerous cute cartoon reindeer, reindeer's with sleighs, reindeer ears, sets of reindeer and lots with beautiful antlers like this Silhouette Reindeer (Product Code: C1362) 
For this little fella, I have pulled out the distress Inks, in Honey Oak and Sage and the smallest bit of Barn Door, then dry brushed some cream acrylic paints in places to give the mottled effect. After applying two coats of Ultra Thick Embossing Enamel (UTEE), I applied some pearls to add a bit of Bling to his antlers....and of course a red nose.
Here is the complete LO, a picture of two of your boys at their favourite christmas place.... the dining table.....
I have also added the awesome Christmas page border called "World Wide Christmas" (Product Code: C1372),
 This border had the same treatment as above, only with extra of the red, and I also added a white acrylic paint dry brushed in parts. 
Why not head on in to your local Scrapbook Store and ask them if they already have these wonderful products or request them to order them in for you.

Don't forget to pop back regularly to get more inspiration.

TTFN and happy WOWing
Kimmi.


Thursday, November 10, 2011

Christmas bling!

Christmas has well and truly arrived at WOW. All the inspiration for Christmas pages is fantastic and I hope you are all getting your fix!

I've had fun playing with quite a bit of WOW chippie lately to get in the festive spirit. Today I am going to share with you the gorgeous Curly Swirly Christmas tree I blinged up.

To start with, gold emboss the entire tree like so:


Then to get the bling started, have a play with some Gold Stickles. I have highlighted parts of the tree.
And then finished off the bling with some red rhinestones....
And this is the finished product on my layout....


And while everyone is in the festive mood, here's another Christmas idea just for fun!

For this layout I have coloured the Candy Cane with Twinkling H2O's. The snowflake stamp has been embossed in silver and pearl glitter embossing powder. A close up for good measure......


Stay tuned to the WOW blog for an abundance of Christmas ideas.

Happy scrapping!
xx Renae

Monday, November 7, 2011

Sleigh Bells Ring Are You Listening?

Sleigh bells ring, are you listening,
On the layout, glitter glass is glistening
A beautiful sight,
We're scrapping tonight,
With all Christmas Chipboard in Wowland
.
Yes it's that time of year where we are all very busy making Christmas Cards and handmade Christmas Gifts.
I usually wait until Dec to start using Christmas papers but this year I thought I would do some layouts coming up to Christmas, as sometimes you just run out of time in Dec.
In this layout I used: New Christmas Flourish.
which I displayed on: 12x12 Page Display Stand M183


Step By Step for Christmas Flourish
1. Paint the Flourish with Tim Holtz Brass Crackle paint, dry with heat gun or leave to dry.
2. With a paint brush cover the stars with pewter Liquid Pearls, you can also dry brush some of the flourish with liquid pearls around the edges, then leave to dry.
3. Colour in the tree with a  pink marker, then apply a coat of dimensional magic, then sprinkle Glitter glass or glitter over the top, shake off excess glitter then leave to dry.
4. Wrap some ribbon or glitter twine around some of the flourish.

Step By Step For Display Stand
1. Paint the stand in white paint or I like to use Gesso as it gives a matt look,
2. When the paint it dry sand parts back to give it a distressed look,
3. Coat parts of the display frame with Dimension Magic, then sprinkle with Glitter glass or glitter, shake off excess and leave to dry.
Note: you can paint a different colour on the other side of the stand so you can change the stand to suit the layout.

This is part off the
I did for this months Scrapbook Creations, so make sure you grab a copy to see the Christmas Tree which would make a great Christmas centre piece for years to come.


Also in Scrapbook Creations this month I created a Christmas mini  album using:
which makes a great coffee table book for your guest to look at  this Christmas time or you could open up and use as a banner.
 
I will be playing with some more Christmas pieces every soon as Christmas is my favourite time of the year.
Thanks Gilly oxo
Posted by Picasa

Saturday, November 5, 2011

SOMETHING DIFFERENT!!!

This week I am doing something different!!

We can now make your chipboard even more exciting!  How would you like it to be self-adhesive??

We have designed some new alphabets and EXCLUSIVE to WOW they are stickers!!!!  Want a sneak peak?? 


We can also do them in Ebony mattboard so if you use a lot of black lettering - now you can save yourself the time of painting or inking them and buy them already black!!!!

We will also be offering in the very near future the option for retailers to purchase all their chipboard in self-adhesive!!  So not only can WOW offer 1.2mm chipboard, 1.8mm chipboard and Ebony mattboard we will be offering self-adhesive!!  We can also put this on MDF items for your scrapbooking page!!!

See your local WOW retailer and express your interest now!!!

For now, I am off to the Papercrafts Festival at Penrith!!

Suzanne

Thursday, November 3, 2011

FRAMED!!!!!!!!!!!!

Not very often do I get a picture with me and the whole family in it, cos someone has to take the photo, right?!

So, when I set the timer and placed my camera balancing precariously on the rocks down at the beach, I wanted to capture a nice family shot on a glorious sunny day….and I did it! it turned out terrific and I loved it so much I knew I had to FRAME IT!

I chose to use the decorative MDF frame, with a heap of prima flowers to decorate it!

First thing I did was spray the background MDF with Glimmermist in Turquoise

step1

I made some larger ‘flicks’ and ‘splats’ on the second coat to give it a bit more dimension

step1a

Then I adhered an inked piece of Bo Bunny paper on the base.

step2

Then I put my photo where I wanted it, and adhered a misted circle frame

step3

The next step was to start decorating. I chose flowers and embellishments in complimenting colours, like kraft, cream, brown and teal. I also misted a flourish to compliment the background frame.

step4

I just layered on more and more flowers to really decorate the cluster in the corner. I also sliced out a couple of edge pieces of the circle so that the ledge would fit back in place!

step5

Final step was to put on the ledge and some floral chipboard pieces, then accentuate with a black pen for defintion

step6

I added some Prima pebbles to the flower centres for more depth and dimension

close 2

Here is a close up of the final clustering!

close up 1

and finally……VOILE!!!!!!!!!!!!!!!!!!!!!…. a treasured memory…FRAMED!

family frame

Tuesday, November 1, 2011

Christmas is coming…

…and what do you get your child’s teacher year in year out??

If you are anything like me, you have done the choccies to death, done the mugs and the stationary, gift vouchers and wine. Hmmmmm..they can be tricky those teachers, but you want to show your appreciation for all their hard work they have put in to your little devils all year!

This year, i came across these Cork message boards on Clearence and thought that they would look great altered and individualised for Teacher’s presents for Christmas. I decided to use some of the large WOW chipboard pieces that I have been sent in my DT kit, as i often struggle to use BIG chippies on layouts. I have altered the chippies with felt pens and Glimmermists.

I have made 3 Message Cord Boards so far….!

IMG_0334IMG_0343IMG_0391

This 1st one is for my son Charlie’s Prep Teacher Miss Millen. I have used some fun colour combinations to reflect her personality, and I have used feminine accessories.

IMG_0335

I decorated one of the ornate trees with mists and white pen, and also used the decorative Owl as a stand out piece on the project.

IMG_0336

For the Second Cork Board, for my Son Angus’ Kindergarten teacher Mrs Lade, I have gone with a more traditional colours and school theme.

IMG_0338

I have painted the letters and numbers from the boarder piece with paints, and outlines with a Sharpie pen and black versa ink.

IMG_0339

For the 3rd Cork board, for my friend’s daughter’s teacher Mr V, I have one with a fun and cheeky look.

IMG_0392

I have used the little aliens and a large ornate tree on this one. Colouring with glimmermists and a black Sharpie pen. Altering the tree with buttons to represent apples, and I have put pearls on the aliens eyes!

IMG_0388

So if you are looking for a fun and creative present to give your child’s teacher, why not consider something like this. You could also alter diaries and notebooks, stationary sets and pencil cases, or get a nice picture of your child and alter a frame with some WOW chipboard pieces…the options are endless!

Happy Creating

Cheers Wendy x x x