Photobucket Photobucket Photobucket Photobucket Photobucket

Sunday, September 30, 2012

Emmas week–No pattern paper

Hi Guys, Its Em back again for a week with the WOW blog.  Today Im going to share a layout I created using no patter paper.

I started with a piece of white cardstock and my AltaMATZ 6 X 6 CHEVRON NARROW (ALTA023)

IMG_1729

I randomly popped the AltaMATZ over the cardstock and sprayed with mists.

IMG_1728

I wanted a grungy look for my layout so I used some black paint spread randomly over the cardstock as well. 

IMG_1730

I used a circle from the 12x12 CIRCLE FRAME SET (C828) coloured it with black ink and outlined and drew a pattern on it with a white pen. I also added embellishments and a title.  Here is the final layout, with not one piece of patter paper on it.  Its very easy to use your AltaMATZ to create your own pattern paper, give it a go I dare you :)

IMG_2024IMG_2027IMG_2028

Thanks for stopping by today, I will be posting through out the week so please check back every day Smile 

Em x

Monday, September 24, 2012

Recipe challenge | September 2012

This month's WOW challenge is to create a layout based on this recipe!

Let's see how the WOW design team tackled this month's recipe challenge!

Layout by Sandra Staples

Layout by Lisa Warren


Layout by Kellie Moore

Layout by Kerryn Fry
Photobucket

Photobucket

Layout by Monique Follett
  

Layout by Emma Allen
IMG_2008

IMG_2012

IMG_2013
To enter, simply upload your take on the challenge to your blog, then add it to the linky below! Remember to use the actual url of your post, not your blog home page.  You can also add the linky to your own blog post! That way you can continue to be inspired by everyone's layouts.

Entries close midnight, Saturday 20 October 2012. We can't wait to see your layouts!

Remember to head into your local or online scrapbook stores to purchase your WOW products.
get the InLinkz code

Saturday, September 22, 2012

Creating a Textured Background with Your Altamatz

Hi Everyone,
Just one last post from me.
I thought I'd show you a little step x step on how to create a textured background using your WOW Altamatz.

I have created  a canvas for my son's room with a Dr Suess quote.  He really did say the most meaningful things, in such a fun way, didn't he?

1.  Use gesso to prime your background - for me, it was this 12 x 12 canvas.


2.  Next using your chosen Altamatz and Texture Past, apply your background.  Sometimes I use random bits of my Altamatz, sometimes I use the whole 12  12 Altamatz, sometimes I use a  6 x 6 Altamatz and turn it around the area.
 
This was done using the 6x6 Altamatz Random Circles ALTA051.  I turned the Altamatz around my canvas to make sure the whole area was covered.


3.  Allow to dry, then select your papers an mists to go with them.  I chose Echo Park's "A Boy's Life" and also some Tattered Angels Glimmermist in Nougat, some Dyan Reaveley Dylusions Spray in Yellow and Orange, and some Studio Calico Mist in Meadow. 


4.  Once the texture paste is dry, apply your inks, mists and paints to the background - just randomly have a play and see what you come up with.


As you can see, I decided to simply paint on some Nougat, then some yellow, then I added some of the Orange and Meadow as dribbles, dabbing them with paper towel as I went.
 
 
5. Once this is dry, add your papers and embelleshments as desired.
 
This is what I came up with:


See?  Quite easy hey?
 
Well, it's time for me to hit the sack - big day ahead of us tomorrow.
Thank you for joining me on the WOW - Words or Whatever Blog this week, I've enjoyed being here and hope I have been inspiring you to use your WOW chipboard and Altamatz.

Friday, September 21, 2012

What Is Your Favourite?

What is your favourite WOW product?
I love just about all the products at WOW - Words or Whatever, but if pushed, I'd have to say it would be:

The 12x12 Star Frames C1468

This product is  BRILLIANT for Boy Layouts - and just so versatile. 
 
Here are 2 layouts I've done using them:


With this layout, I've used 1 large star to "frame" my photos and draw the attention to them.  I painted it with red paint, and layered it under my photos, journaling and embellishment cluster.
 
This next layou used some smaller stars, which I placed to give a cascading effect, still drawing the eye to the layout.


I gave this chipboard an inky treatment, first inking them in a chalk ink - in yellow, then highlighting the edges in black.
Next time you are shopping for WOW - Words or Whatever Product, don't forget to pop these little beauties in your basket, they are so very versatile, and also are excellent value for money!

Thursday, September 20, 2012

Altered WOW


I’m back again, this time sharing a layout that has some chipboard that has been altered in two different ways.

So-Beautiful

First of all, I got a Decorative Border Panel C1453, and used some Distress Stain, in Chipped Sapphire on it.

Next, I used The Block Alphabet Uppercase C1388 for my title, and added some Ranger Liquid Pearls to them to give them a lovely pearly sheen.

I have also used the Decorative Doily Altamatz ALTA033 which I sprayed with Marshmallow Glimmermist.  I love using a light mist on darker papers – it is just so effective!

Well, that’s it for me this evening, I am planning on spending the next couple of hours scrapping, and also a fair bit of tomorrow, so I’ll be back with some more shares later tomorrow Smile

Monday, September 17, 2012

Altering Your Chipboard

Now I know that WOW – Words or Whatever chipboard looks just splendid raw, and if you like it that way, than that is perfectly OK with me.

BUT – if you are a bit obsessive like me, and you like to colour and alter your chipboard to match your layout, then there are a multitude of ways you can do that.

In my layout “I Love You to the Moon and Back” I have applied layers to my chipboard.  Just like with any aspect of your layout, the more you layer, the more depth and dimension you achieve.

Firstly I painted my WOW- Words Or Whatever Title “I Love You To The Moon and Back” WOW1539, the WOW – Words Or Whatever 12x12 Star Frames C1468, and the stars I cut from the WOW – Words or Whatever Star Border C655 red, when that was dry, I stamped the border stars and the Title Piece  with a grungy splatter stamp in Black Stazon.

IMG_6609

Can you see how stamping onto an already painted chipboard piece add interest and dimension to your entire layout?

Hope this inspires you to break out those inks, paints and stamps and start layering them up on your chipboard Smile

See you all tomorrow Peeps!

Sunday, September 16, 2012

A Little Bit “Off The Page”


I was sent this gorgeous Ornate Shadow Box Frame M153.

M153_ORNATE_SHADOW_BOX 

These Off The Page Pieces are cut in MDF, and they are beautifully done.  They fit together so easily, even after the pieces have been cut.  so much better than other brands.  I was put off making Off the Page pieces due to my difficulty in putting them together, but not anymore!  These are awesome!

I decided to create a bit of a tribute to my Great Uncle, who served in the Australian Air Force during World War II.  He was actually in Darwin when it was bombed, and was lucky enough to survive.  After the war, he returned to Ipswich, but later followed his daughter to Western Australia.  Nanna was very sad that she never saw him again after that.  I plan on giving this to her for Christmas:

Lest-We-Forget

To make this, I first painted all the pieces BEFORE I put it all together.  I used a Chocolate Paint, and then went over it randomly with a Ranger Dauber in Gold to give it a bit of depth.  Then I traced around the front frame onto the paper I wanted to use to get the dimensions.  I cut the frame out slightly smaller than the MDF front, so it would have a slight border.  Once I had all my prep work done, I put it all together.  The pieces fit together perfectly, and just needed a tiny dab of glue on the tabs.

I also used the WOW – Words or Whatever “Lest We Forget” Title C866 which I also painted with a Ranger Dauber – Gold.  Once the glue was dry on my Shadow Box, I started to put it all together.  I just lightly sanded the edge of the photo before adhering it on to the back of the frame.  I inked around the paper frame with a dark brown ink, and glued it onto the front of the Shadow Box.  I adhered the title to the base of the Shadow Box, and then place a little nest with 3 eggs in the right hand corner of the Shadow Box.  I tried to add a bit of an “Aussie Theme” by fussy cutting some Australian Flora from my paper, and layering it onto the top right corner.  I wanted to make them look aged so I painted them over with some Crackle Accents.  I also added a picture of a Budgie, which was distressed by wet paper crumpling, then inking when it was dry.  I finished the whole piece off by adding some coordinating flowers.

Here is a close up of my Title, and the Frame.

Lest-We-Forget-CU

Thanks for joining me again, I’ll be back again tomorrow with some more sharesSmile

Saturday, September 15, 2012

Different Ways To Use Themed Packs

Hi everyone!  It’s my turn to host the blog this week.  I’m so looking forward to sharing some scrappy creations with you, using the fabulous WOW – Words or Whatever Chipboard.

Have you ever loved the look of themed packs, but couldn’t think of what else to use them for, other than the theme for which they were intended?  Well, it’s time to think outside the box and use your Themed WOW chipboard pieces for ALL of your layouts.

I loved the look of the this WOW – Words or Whatever Rifle Shooting Pack WOW1606.  Even though it is an army/cadet/paintball type theme, I knew I could use it on a grungy type layout of my Mr 7.

This is what I did:

                      Sharp-Shooting-Attitude

I’ve titled it “Mr Sharp Shooting Attitude” and I’ve journalled about his rather unnerving habit of saying absolutely everything that is on his mind.  It really does keep me on my toes, I’m forever waiting for him to start blurting out something really really embarrassing! 

With this title, the rifle embellishment is a good tie in, and I’ve also included some of the “blasts” from the kit.  All chipboard has simply been painted with black gesso – to link with the black paint smudges on the background.

Here is a close up:

Close-Up

This next layout is created using some of the Leafy Branches from the WOW – Words Or Whatever Leafy Branch Small Pack WOW1528

IMG_6607

I really wanted to use some green seaweed embellishments on my grungy beach-themed layout, and pulled out my Leafy Branch Pack, thinking they would be perfect.

All I did was ink them in Distress Ink, and add some Distress Embossing powder to give them some texture.

What do you think?  I think they blended perfectly with my layout!

So, you see, with a little bit of thinking outside the square, you can use your chipboard pieces for just about any themed layout you want!

Thanks for popping by the WOW Blog!

Chipboard, mdf or ebony matt board?

Hi All! Lisa Warren here with the final instalment of new release products for September 2012.

Did you know...WOW produces their beautiful designs in both chipboard and ebony matt board?  This month sees the release of gorgeous doily corners. You've already seen Emma use the chipboard version in her "dress ups" layout...now see how the same design looks in black!
For my layout, I have used two of doily corners to frame the base of my photo...much like bookends.
WOW's ebony cuts are so easy to use. No decoration need at all...just add glue, and adhere to your layout!

This month, WOW also released a range of mini embellishments that can be cut in either chipboard or mdf!
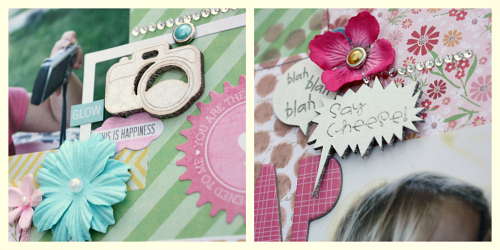
 For this layout, I have used the chipboard mini speech bubbles and mdf mini cameras.
I have treated both the chipboard and mdf pieces the same way...spritzing them with white mist, then blasted with a heat gun. The heat gun pushed the mist out of the grooves, to reveal the detail on the pieces.
For more great WOW projects, scroll through the blog...then head to your local or online scrapbook store to pick up some for yourself!

Cheers, Lis.

New releases for September - Kerryn

Morning All!

It's my turn to share some new releases with you, hope you enjoy them.

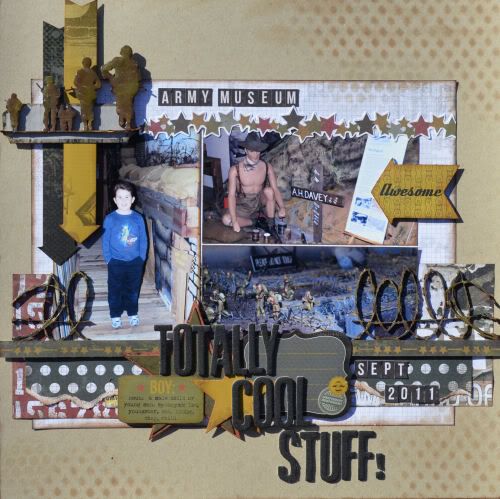
Both pages are very masculine and showcase one of my son's favourite things.
The chipboard was the perfect addition to both pages.

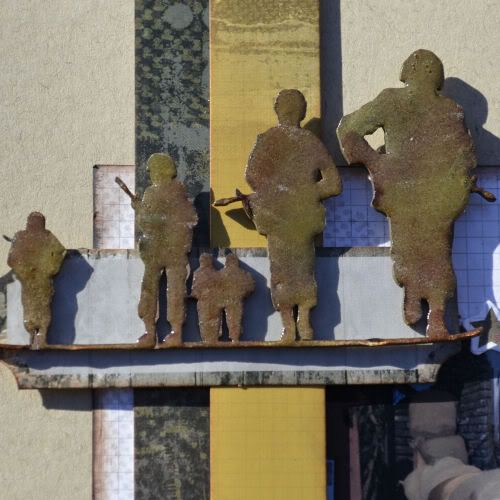
The first page features the Barbed Wire Coil and the group of soldiers.

WOW1604 BARBED WIRE COIL
WOW1602 SOLDIER PACK


Photobucket

Photobucket

Totally cool stuff

Photobucket


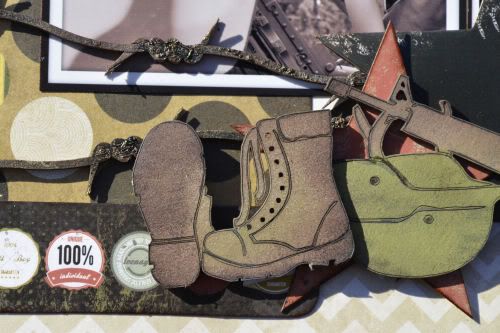
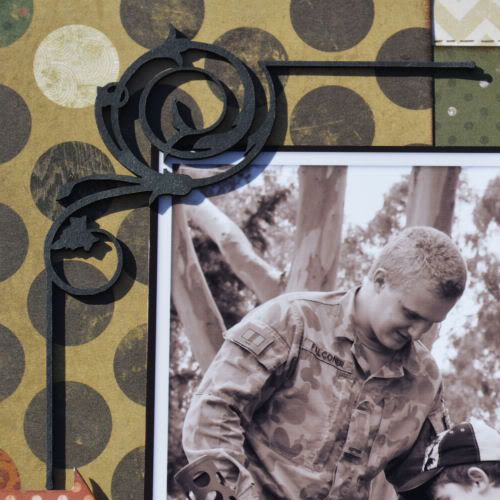
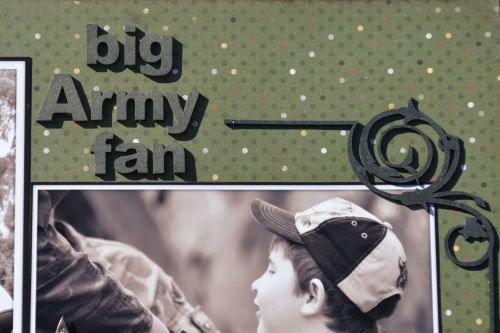
My next page showcases more of the very cool Soldier chipboard and some fancy corner pieces.
The boots and Rifle have been inked in layers to give them the Army look.
The corners have been left naked.

Photobucket

WOW1615E FLOURISH CORNERS 2

Photobucket

You will also spot an old favourite, the Barbed Wire Border (C1503)

Photobucket

The title has been created using the Classic Alphabet Lowercase (C1385)

Big Army Fan

Photobucket

Thank you for coming to the blog and viewing some more of the latest release chipboard at WOW
Kerryn x x x