



Photobucket Photobucket Photobucket Photobucket Photobucket
Showing posts with label embossing. Show all posts

Thursday, February 18, 2016

Wild Daisies - By Elisa Ablett

Hi WOW friends,
 
 
Elisa here from the design team again sharing a layout I created called - Beautiful - featuring one of my photos of beautiful native daisies:

WOW Words or Whatever Products used:

Beautiful title chipboard
Bouquet Chipboard
Flourish Altamatz
Floral scroll chipboard


Here are some close ups and you can definitely see the amazing shine and shimmer of the Colour Blast Australia Products on the WOW Chipboard.
 
 
In this layout I used the flourish altamatz and Colour Blast 'apple of my eye' paste to create the start of my mixed media background. I also used the 'Bling' Colour Blast Spray to create a second colour over the paste. I embossed the centres of the flowers with bling embossing powder and filled in a few spaces with a Kaszazz Morrocan background stamp. Some of the techniques I used on the chipboard include white sharpie paint pen on the flowers and title and embossing. So versatile that chipboard!!
 
 
A hint: I delved into my old rub-on stash and pulled out a few from Cherry Arte and I used them in strategic places to fill in a few gaps, a fantastic way to use a product that perhaps has been laying around for a while..


Well thank you so much for stopping by, we love to hear from you in the comments, you can further follow me via Elisa's Blog, Facebook, Instagram
 
Elisa xx

Monday, November 14, 2011

Beautiful Reindeer


Have you checked out the great range of Reindeer that are available from Words or Whatever yet????

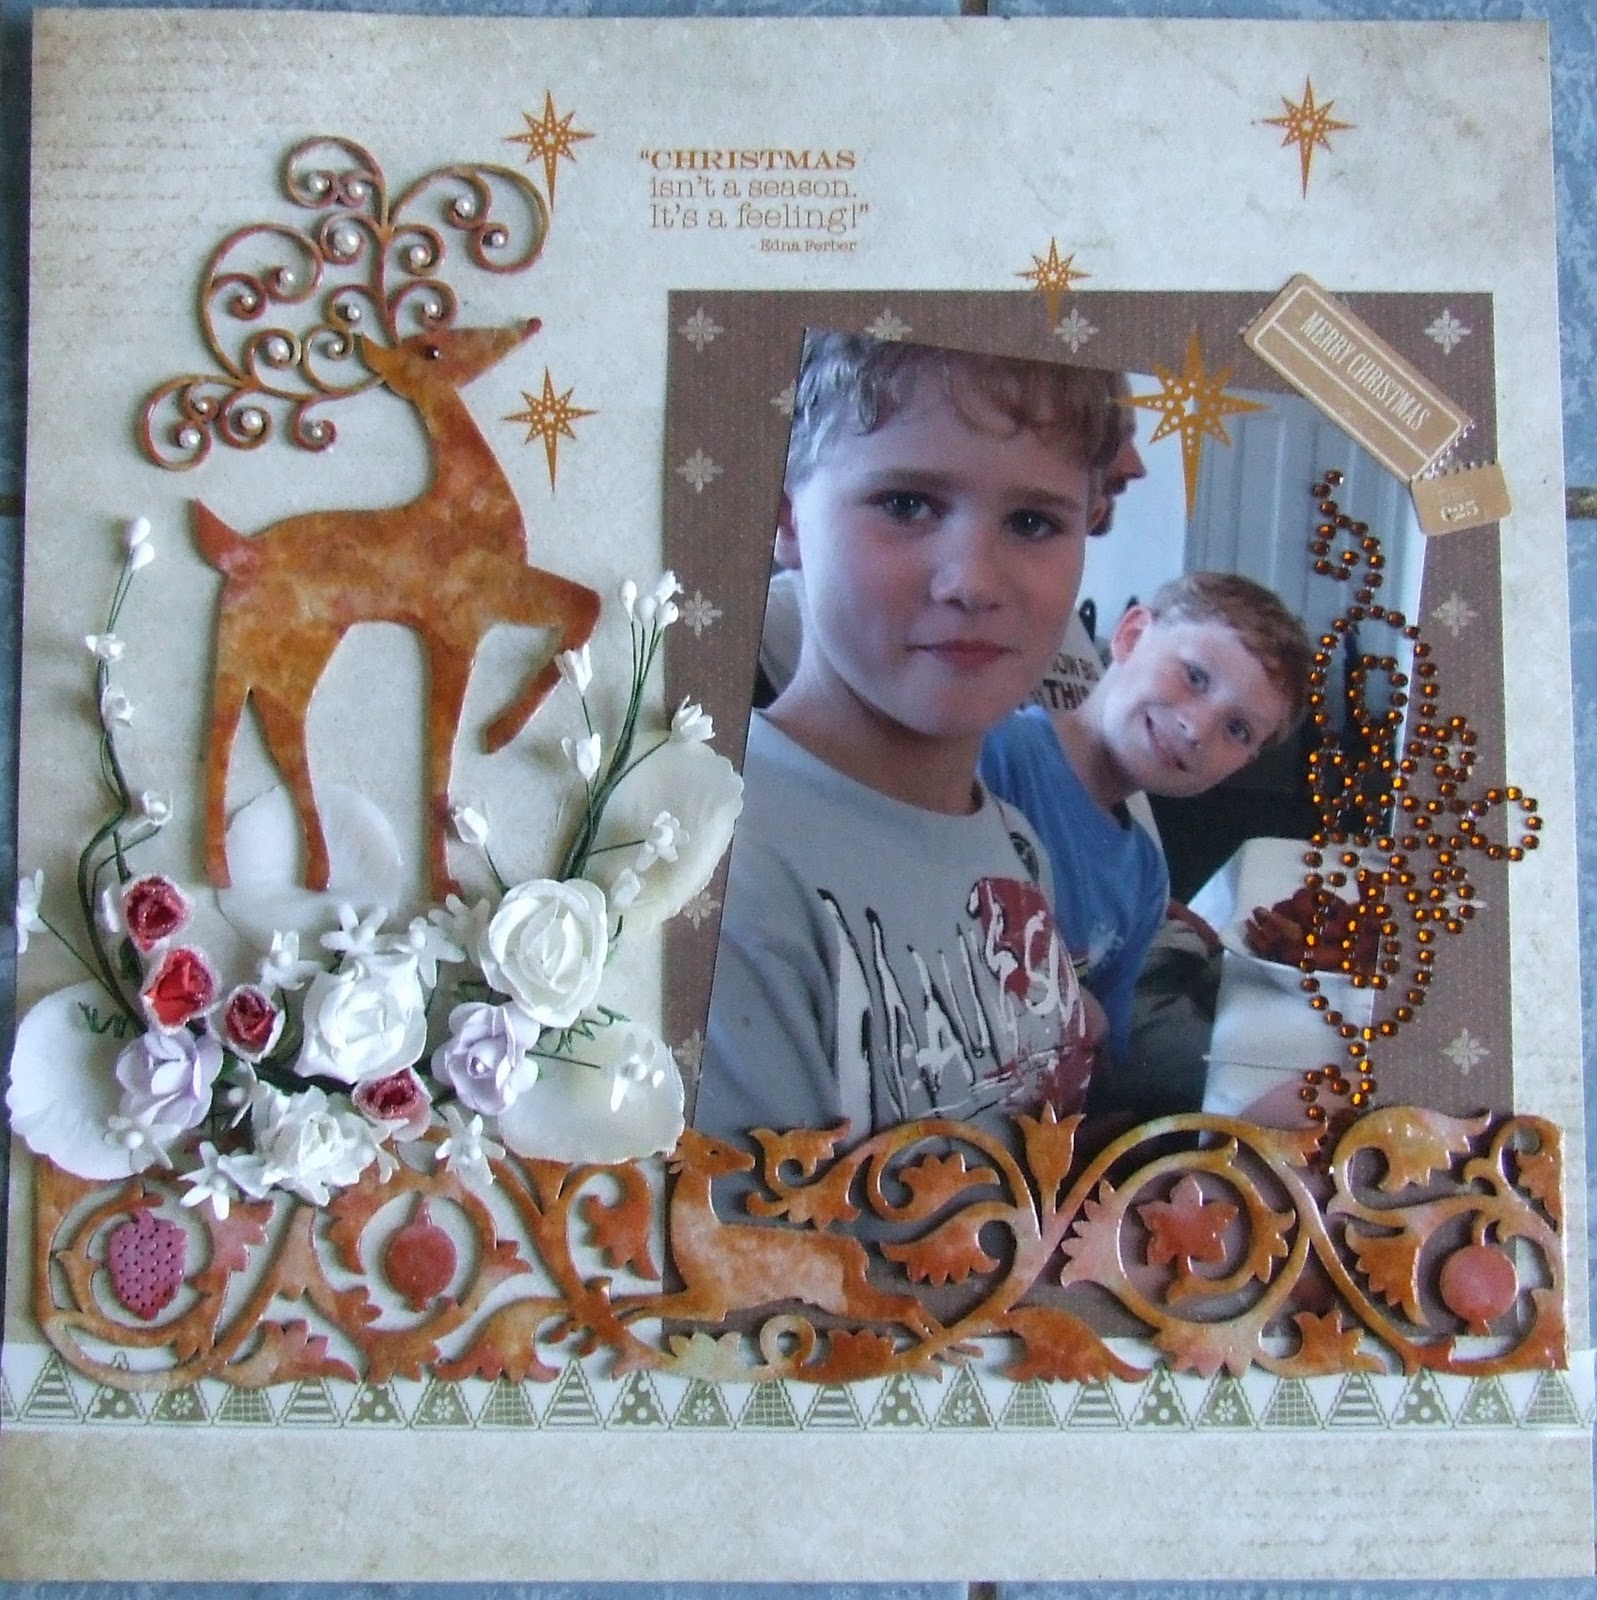
There are over 20 designs of Reindeer, including numerous cute cartoon reindeer, reindeer's with sleighs, reindeer ears, sets of reindeer and lots with beautiful antlers like this Silhouette Reindeer (Product Code: C1362) 
For this little fella, I have pulled out the distress Inks, in Honey Oak and Sage and the smallest bit of Barn Door, then dry brushed some cream acrylic paints in places to give the mottled effect. After applying two coats of Ultra Thick Embossing Enamel (UTEE), I applied some pearls to add a bit of Bling to his antlers....and of course a red nose.
Here is the complete LO, a picture of two of your boys at their favourite christmas place.... the dining table.....
I have also added the awesome Christmas page border called "World Wide Christmas" (Product Code: C1372),
 This border had the same treatment as above, only with extra of the red, and I also added a white acrylic paint dry brushed in parts. 
Why not head on in to your local Scrapbook Store and ask them if they already have these wonderful products or request them to order them in for you.

Don't forget to pop back regularly to get more inspiration.

TTFN and happy WOWing
Kimmi.


Thursday, November 10, 2011

Christmas bling!

Christmas has well and truly arrived at WOW. All the inspiration for Christmas pages is fantastic and I hope you are all getting your fix!

I've had fun playing with quite a bit of WOW chippie lately to get in the festive spirit. Today I am going to share with you the gorgeous Curly Swirly Christmas tree I blinged up.

To start with, gold emboss the entire tree like so:


Then to get the bling started, have a play with some Gold Stickles. I have highlighted parts of the tree.
And then finished off the bling with some red rhinestones....
And this is the finished product on my layout....


And while everyone is in the festive mood, here's another Christmas idea just for fun!

For this layout I have coloured the Candy Cane with Twinkling H2O's. The snowflake stamp has been embossed in silver and pearl glitter embossing powder. A close up for good measure......


Stay tuned to the WOW blog for an abundance of Christmas ideas.

Happy scrapping!
xx Renae

Monday, July 25, 2011

This is what happens when you change your mind...

When I first saw this Paris chipboard from WOW, I instantly knew what I wanted to do with it.

My sister had bought us a cute silver magnet with a sparkly Eiffel Tower just before our own trip there and as soon as I saw it, I knew I wanted to recreate it somehow in my scrapbooking.

Unfortunately, as most of us find, what we originally want to do doesn’t always work with our layouts. So I’m going to show you the original finish and how I changed it to make it work with my page. I usually leave the finishing touches to my chipboard until I’ve finished my layout and know what colours I am working with, but I was determined to use my original inspiration and threw my usually good laid plans out the window!

We are going to emboss this one, so to start with, you will need your chipboard, embossing powder, Versa Mark and your heat gun.

After inking up your chipboard with the Versa Mark, cover your chipboard in the desired embossing powder. I’ve done mine in 2 stages. I did the Eiffel Tower in the Tim Holtz glitter distress powder first and then once that was heated up and cooled down, I repeated the letters with the silver.

With the Tim Holtz Distress Embossing Powder, you can use your finger to rub parts of it back.

I wanted to regain some of the pattern on the Eiffel Tower part, so I rubbed away at it and was able to gain more definition without compromising the “glittery” finish that I was after.

And then I ended up with this finished product….. exactly like my cute magnet inspiration!

Then came the problem…. I had used a different colour scheme for my layout and the silver didn’t work with it! Chipboard is so versatile that you can peel away layers, so I carefully peeled back the silver and had raw chipboard again. Then I tried gold and that didn’t work, so I settled for a glittery effect all round and covered the letters in brown glitter.

To apply the glitter, you need to cover the desired area in Glossy Accents and then you can sprinkle your glitter on top. Once the Glossy Accents has dried, shake off the excess glitter.

Finally I ended up with the perfect finish for my layout!

This now worked well with my overall colour scheme and design. To finish off, I added a chipboard flourish in a plain brown ink and here is the completed product.

Thank you all for looking and enjoy your scrapping experience. Don't forget to keep an eye out for more beautiful work from our talented Design Team.

xx Renae