Photobucket Photobucket Photobucket Photobucket Photobucket
Showing posts with label the WOW design team.. Show all posts

Tuesday, February 16, 2016

Boys

Popping in to share a page today.
A pic of me with a touch of 'hat head',
 and my youngest boys on holiday in Tassie,
visiting Salamanca Martkets.
WoW products used are the 'This Moment' corner, the place marker at top right of photo, the dangling heart, and 'Twenty Fifteen' title. The background was done by stamping with paint and punchinella. I also used an old Hambly transparency (love those!).

Thursday, January 21, 2016

Altered Ornate Shadow Box

Hello there!

Tania back with you today to share this quick and easy photo tutorial on how I altered one of the WOW Chipboard Ornate Shadow Boxes - M15.


Once I had assembled my shadow box I mixed a little bit of one of my Dylusions sprays (aqua based) with some Gesso.  With a large sponge I applied it to my shadow box quite thick, when it was almost dry I gave it another coat. As you can see it gave it some great texture.


I then used some Ken Oliver Color Bursts to give my shadow box some colour.  I just love this product, lots of fun and looks awesome.  I chose purple for this project.  I sprinkled the Color Burst randomly over the shadow box and then spritzed it with water until I was happy with the colour......How easy is that??


I finished off my shadow box with some New release chipboard - Dangles and one of the "Love This" quote from the Fun-Multi Word Pack WOW2457 which I sprayed with Dylusions sprays and lastly added lots of yummy blooms.

Here's a couple of close ups.


I also wanted to share a couple of other projects I made recently using some yummy WOW products.
I created this first layout for White With One's new challenge. Butterfly Elements WOW1858, Hanging Heart Flourish WOW2287,  Fun-Multi Word Pack WOW2457  and the 6 x 6 Moroccan Stencil ALTA138.


My second project was created for Off the Rails latest Mood Board Challenge.
I have used a New Release "Summer At The Beach" WOW2466 Chipboard Title on this one. 


Well that's all from me today.  I do hope you have enjoyed the projects I have shared with you today.

Be sure to check out the Website for products and stockists and our new WOW Creations Facebook page. Can't wait to see your creations on there using all the gorgeous WOW products.

Until next time,

Tania xx 

Monday, January 11, 2016

New Dream Catcher

Hi WoW peeps, welcome to the New Year, here's hoping it's a ripper!

Today I'm sharing with you an awesome off the page piece, a 12" diameter MDF Dream Catcher I have altered as a gift for my boy when he turns 21 this year. I love how this turned out, let me show you how I did it.

I started by adding lots of colour (Dylusions and Perfect Pearls), inspired by the beautiful water colour challenge this month
(see end of post). Once dry I inked all the inside edges black with a Copic marker.
I used  a 12" x 12" white card to mop all the wet colour up and stuck a piece of black card to the back of it. With the black facing forward and the colour-on-white facing back I glued it to the back of the dream catcher and trimmed off the excess, sanding around the edge for a nice finish. I sprayed the front with lots of gold shimmer to make it shine, and it does :-) I also added the challenge quote using a Motex labeller which has a nice art-deco font. I removed the lower panels with a craft knife (and sanding with a file) to allow for feather hanging space.

The back was also inked with a black inkpad and sprayed gold.

The 3 MDF feathers that came with the dream catcher, along with a few real (white) ones were also given the same colour treatment. I coloured some of the white feathers with grey to add some contrast. They all got gold shimmer.

To attach them to the dream catcher required a little ingenuity, I wanted it to look clean and stream-lined so this is what I did....
With a fine line of liquid glue (Tombow Mono-Multli - green) I stuck the string (also sprayed gold and dried) along the shaft of the feather. I covered the join with a strip of co-ordinating washi tape. For the MDF feathers I threaded them with leather thonging, sticking it to itself before the next step.

I then used 3mm double sided tape and wound a 3mm yellow ribbon along the shaft to cover the washi, tucking the string end back under itself using a fine quilling tool. To ensure this doesn't come apart I painted the whole ribbon bit, and up along the string, with Tattered Angels Glimmer Glam which acts as a glue and dries to a gorgeous shiny gold sparkle. 

I tied all the feathers to the bottom of the dream catcher using a half hitch knot and reinforced the knot with Glimmer Glam. I left the tails of the leather thonging long and glued some bright orange feathers onto them, covering the join with beads (and glue down the middle). The tails of string I cut short.

And this is the final product. Took me a while but I seriously love it!

Inspired by our current challenge
Come and join us, click on the image above to go to the blog, or see us on Facebook and share your creations.
Happy New Year may it be full of creativity.

Thursday, November 26, 2015

Almost a Teenager

Hello folks, hoping you are all well.
Peg here to share some WoW goodness today.
I have done a boy page using some new release chippies for November as well as some tried and true favourites.

I started by misting my white card using the 12x12 Moroccan chipboard as a stencil, rotating it clockwise for the second colour. This is also available as a stencil and both in 6x6 too.

I then stuck some cogs, from the 12x12 nesting set, in the corners and added some leftover cut-outs from the Moroccan chippy (these are a bit of a special treat as they are not yet stocked in the shop). I rubbed all the chippy with some Inka Gold- Graphite to give it a metallic look.

It didn't look quite right though, so I used a paint dauber to add some blue.

Next I layered some tissue paper, some New Release chipboard treated with Inka Gold-Graphite, my photo, and a title from my own design range painted to match the cogs. Journalling with Dymo - my fave.

And I thought it was finished so it went on my desk-top easel until I had time to get it into an album.
However..... the more I looked at it the more unfinished it appeared.

So I added some subtle diagonal stripes by sponging
black ink through the 4-in-1 Design 2 Altamatz, as well as adding a swirl border, from the New Release summer pack,
above my title.
Ahhhhh, now it's done!

 So, have you checked out our inaugural monthly challenge, it's a beauty. You still have a few days to play along, anything goes as long as you use Wow products and post your creation on our FB page.
This is the page I created for it.

Thanks for coming by, have fun with the challenge, see you next time

Monday, October 12, 2015

A Perfect Page....

I had the most amazing time hanging out with these gals at a Hunter Valley retreat in August. We laughed and cried and shared so many stories and poignant moments that it was hard to do it justice on a scrapbook layout. I spent longer than I normally would on this page and, to me, it shows.

I used a technique on the background learnt from the gorgeous Naomi Cox, with some added stencil work using my new release Boot Stencil and another current fave, Lighthouse Flourish.
The page is also embellished with these chippies - cogs, barbed wire, love this, mini people, a zig-zag arrow, some Prima doodads, a cut file, and Dymo for the captions. I used American Crafts foam words for the title and typed out a long and heartfelt story which is hidden in the envelope.

I poured my heart and soul into this page and I love it so much because it really does completely and perfectly represent my experience at this retreat.
This, to me, is why I scrapbook.

I hope you find some inspiration in this post and have some awesome fun playing with your WoW products. Please come and share your work with us in our new Facebook Group, we love to see what you're creating with WoW!

Thanks for coming by

Thursday, September 29, 2011

Welcome to Thursday.......

Welcome to Thursday and some more WOW inspiration for your week.

This week I've had a play with some texture paste. I love playing with this stuff!

Start painting it on your chipboard and keep adding until you get the desired texture.

Once it has dried (you can speed it up with your heat gun), you can paint, ink or finish however you desire. I have chosen a cream paint to finish it off.

If you want to add a little bit more dimension, once the paint has dried, give the piece of chipboard a light inking.

I've also incorporated a WOW flourish into the layout.... I've finished it with some Twinkling H2O's.
This is how both pieces look on my finished layout......

This pic is my Dad with my gorgeous little nephew at my brother's 30th Birthday. Dad absolutely dotes on him!

Needing some further inspiration? Don't forget to keep an eye out for some further inspiration from the rest of the DT, both here on the WOW blog and over on our individual blogs.

Happy scrapping!

xx Renae

Thursday, August 25, 2011

Happy Thursday!

Welcome to Thursday’s blog post :)

I hope you are all having a fabulous week and are getting creative with lots of WOW goodness.

Here’s another idea for decorating your chipboard…… drag out your rub ons! I went through a craze with rub ons a while back and hardly use them now. Those left over patterns and designs that you wouldn’t normally use are great for adding something different to your chipboard.

To start with, ink up your chipboard if you want some colour. Then go for your life with various patterns across your chipboard.

Depending on how much of a pattern you want, you can add a lot or a little.

Then finish off with a coat of Glossy Accents and ta da……

The finished product…..

And the finished layout…..

I’ve also added a gorgeous WOW flourish with my flower cluster.

Don’t forget to keep an eye out for more inspiring work from the DT and happy scrapping!

xx Renae

Monday, July 25, 2011

This is what happens when you change your mind...

When I first saw this Paris chipboard from WOW, I instantly knew what I wanted to do with it.

My sister had bought us a cute silver magnet with a sparkly Eiffel Tower just before our own trip there and as soon as I saw it, I knew I wanted to recreate it somehow in my scrapbooking.

Unfortunately, as most of us find, what we originally want to do doesn’t always work with our layouts. So I’m going to show you the original finish and how I changed it to make it work with my page. I usually leave the finishing touches to my chipboard until I’ve finished my layout and know what colours I am working with, but I was determined to use my original inspiration and threw my usually good laid plans out the window!

We are going to emboss this one, so to start with, you will need your chipboard, embossing powder, Versa Mark and your heat gun.

After inking up your chipboard with the Versa Mark, cover your chipboard in the desired embossing powder. I’ve done mine in 2 stages. I did the Eiffel Tower in the Tim Holtz glitter distress powder first and then once that was heated up and cooled down, I repeated the letters with the silver.

With the Tim Holtz Distress Embossing Powder, you can use your finger to rub parts of it back.

I wanted to regain some of the pattern on the Eiffel Tower part, so I rubbed away at it and was able to gain more definition without compromising the “glittery” finish that I was after.

And then I ended up with this finished product….. exactly like my cute magnet inspiration!

Then came the problem…. I had used a different colour scheme for my layout and the silver didn’t work with it! Chipboard is so versatile that you can peel away layers, so I carefully peeled back the silver and had raw chipboard again. Then I tried gold and that didn’t work, so I settled for a glittery effect all round and covered the letters in brown glitter.

To apply the glitter, you need to cover the desired area in Glossy Accents and then you can sprinkle your glitter on top. Once the Glossy Accents has dried, shake off the excess glitter.

Finally I ended up with the perfect finish for my layout!

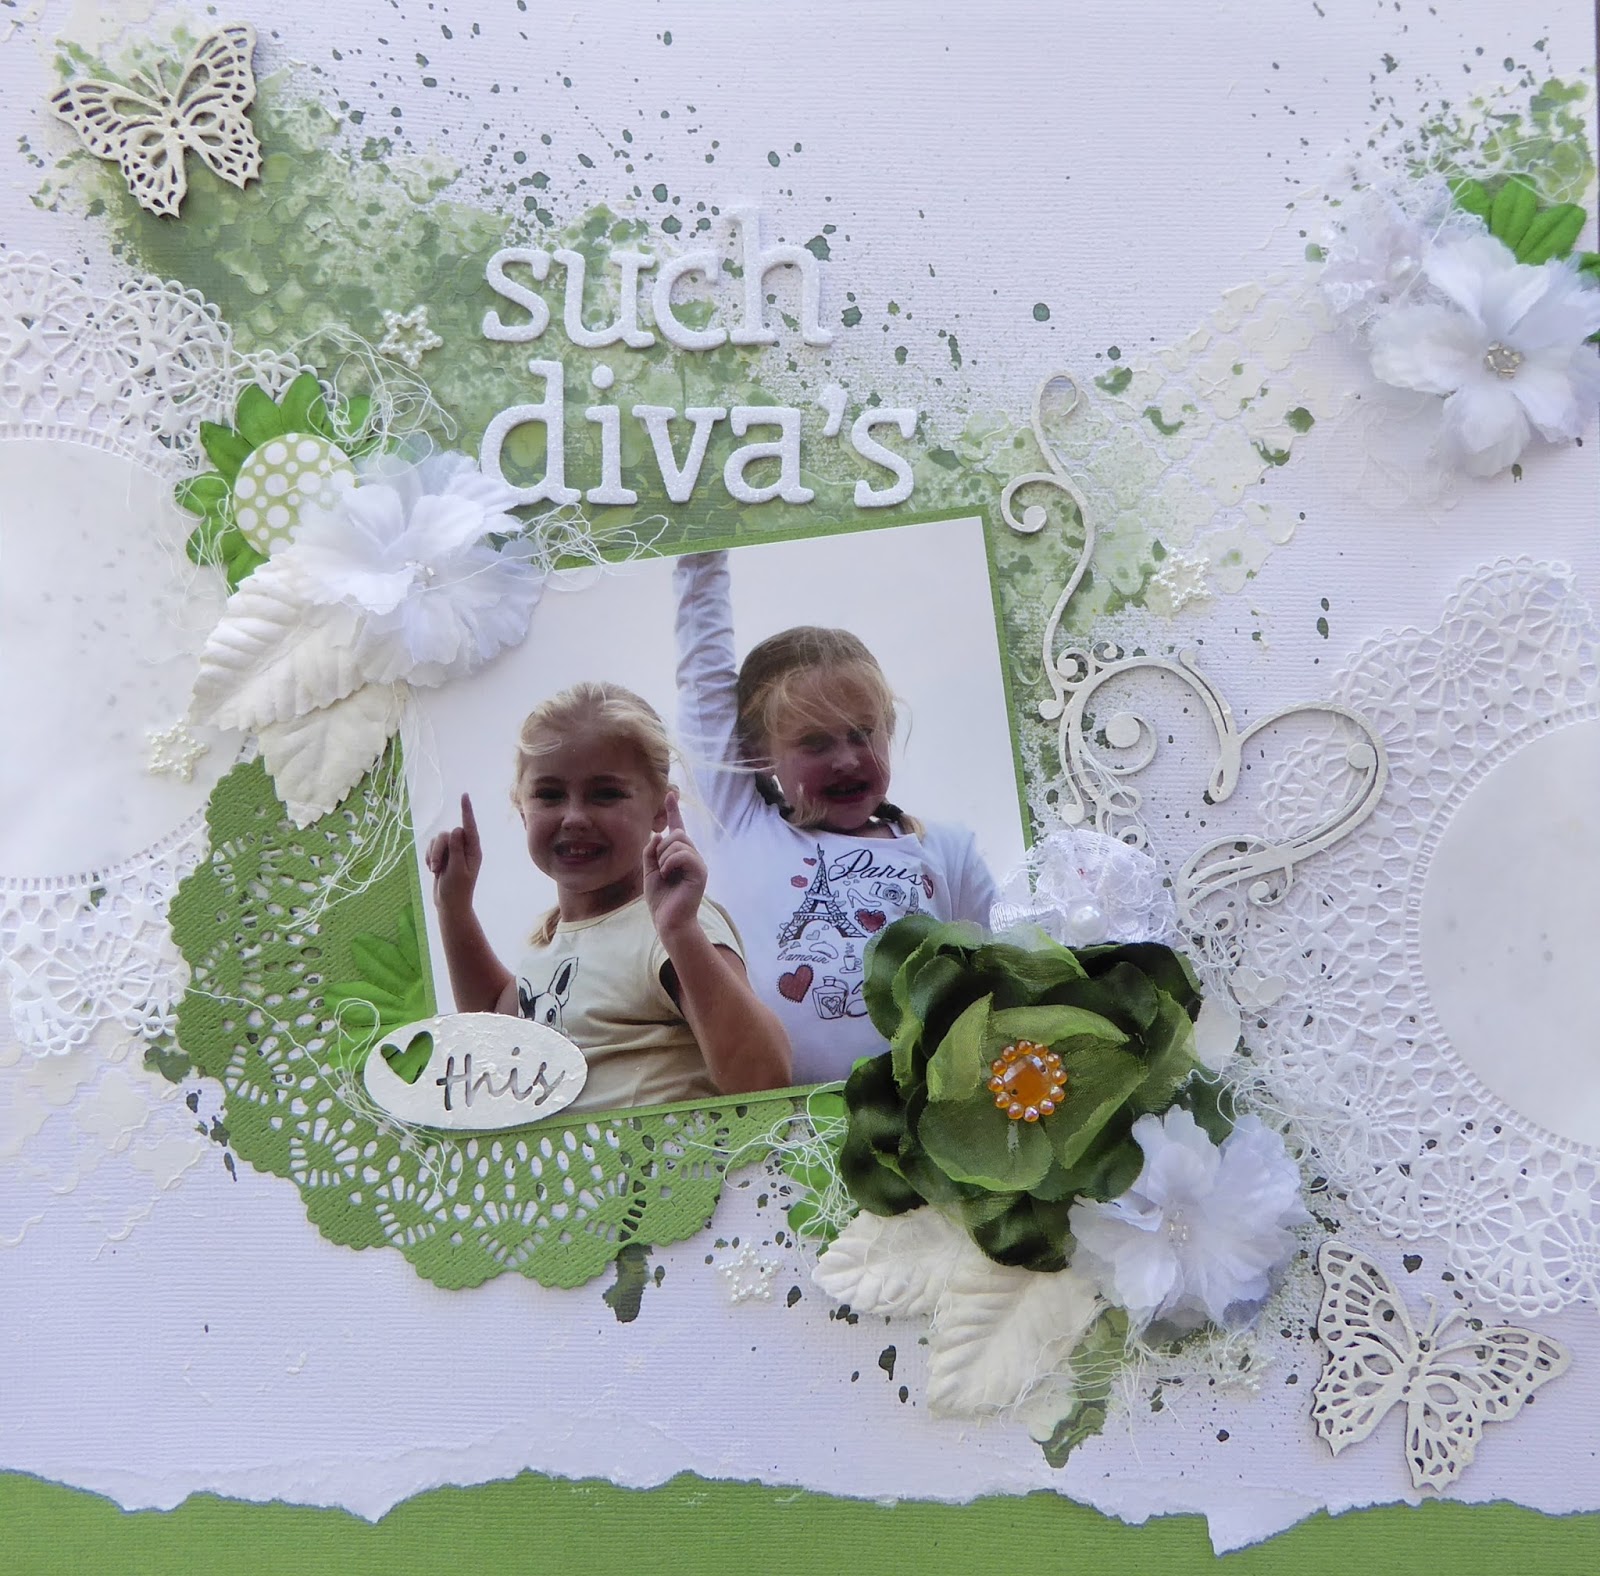
This now worked well with my overall colour scheme and design. To finish off, I added a chipboard flourish in a plain brown ink and here is the completed product.

Thank you all for looking and enjoy your scrapping experience. Don't forget to keep an eye out for more beautiful work from our talented Design Team.

xx Renae

Wednesday, February 2, 2011

Meet the Design team.

Hi and welcome to the Words or Whatever Blog.
We are pleased to introduce you to our fabulous Design Team.
Please click on the photos to view some of the DTs blogs or galleries.


Please become a follower to keep up to date with  reveals and great tutorials from the team featuring
 Words Or Whatevers beautiful products.

Photobucket