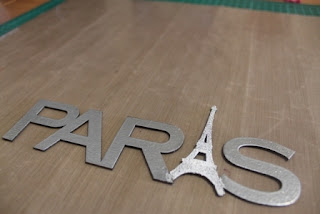
My sister had bought us a cute silver magnet with a sparkly Eiffel Tower just before our own trip there and as soon as I saw it, I knew I wanted to recreate it somehow in my scrapbooking.
Unfortunately, as most of us find, what we originally want to do doesn’t always work with our layouts. So I’m going to show you the original finish and how I changed it to make it work with my page. I usually leave the finishing touches to my chipboard until I’ve finished my layout and know what colours I am working with, but I was determined to use my original inspiration and threw my usually good laid plans out the window!
We are going to emboss this one, so to start with, you will need your chipboard, embossing powder, Versa Mark and your heat gun.
After inking up your chipboard with the Versa Mark, cover your chipboard in the desired embossing powder. I’ve done mine in 2 stages. I did the Eiffel Tower in the Tim Holtz glitter distress powder first and then once that was heated up and cooled down, I repeated the letters with the silver.

With the Tim Holtz Distress Embossing Powder, you can use your finger to rub parts of it back.
I wanted to regain some of the pattern on the Eiffel Tower part, so I rubbed away at it and was able to gain more definition without compromising the “glittery” finish that I was after.
And then I ended up with this finished product….. exactly like my cute magnet inspiration!
Then came the problem…. I had used a different colour scheme for my layout and the silver didn’t work with it! Chipboard is so versatile that you can peel away layers, so I carefully peeled back the silver and had raw chipboard again. Then I tried gold and that didn’t work, so I settled for a glittery effect all round and covered the letters in brown glitter.
To apply the glitter, you need to cover the desired area in Glossy Accents and then you can sprinkle your glitter on top. Once the Glossy Accents has dried, shake off the excess glitter.
Finally I ended up with the perfect finish for my layout!

Thank you all for looking and enjoy your scrapping experience. Don't forget to keep an eye out for more beautiful work from our talented Design Team.
xx Renae


Looks fab Renae. Cheers Di xx
ReplyDeleteRenae, that glitter effect is awesome. Love it.
ReplyDeleteThe chippy was perfect for your layout. Love all the different effects you got.
ReplyDelete